
I’ve gotten requests to write about contouring and I have to be honest: while contouring intrigued me, I never did it expect experimentally until this week. There were two reasons for this: (1) it was time-consuming, and (2) my attempts left me looking more creepy/skeletal than with chiseled cheekbones and a pretty glow. Have any of you experienced the same? You grab a contour kit and follow the image “key” of where to apply the different shades…you follow it precisely and it looks…horrendous. Anyone with me?
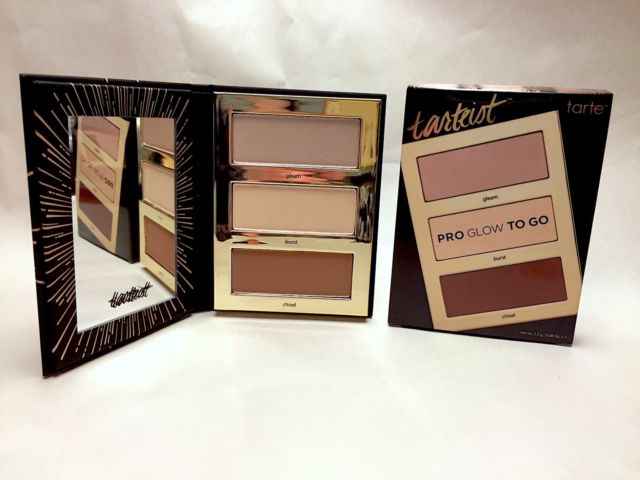
This weekend I was at Ulta for my brows and decided to conquer this last makeup frontier. I tried a cream palette one of the girls recommended that had great reviews. Nope. I asked for another recommendation and she pointed me towards the Tarte Pro Glow to Go Highlight and Contour Palette. I tried the tester and found it was easy to apply, the colors blended well, and it created a natural effect.
When I got home, I watched a few YouTube videos for a refresher and dove in! Here’s the before:
First, using a slightly angled brush (a great option here for $4), I tapped on the dark shade (“chisel”) just below my cheekbones, starting at my ears and stopping roughly in line with the outer corner of my eyes. I also applied it across the very top of my forehead and lightly to my jawline. It looked like this:
Next, I grabbed my favorite blush, NARS Oragasm (this blush is amazing and looks great on ALL skin tones) and applied to the apples of my cheeks: 
After this, I dusted the lightest color (“burst”) below my eyes, at the corner of my brows, and to the tip of my nose. I also applied the dark shade (“chisel”) in lines straight down the sides of my nose, just off the bridge, using an inexpensive, stiff brush like this one. (I meant to do this when applying “chisel” in Step 1, but totally forgot!) This is how it turned out:
And how it looked when I had Ridge take a photo instead of doing another selfie:).
Pro Glow to Go gave me a gently sculpted effect that still looks very natural. It was super easy, and just as important- took very little time. I think one of the key differences with this kit is that it’s a powder instead of cream. I find the powder blends more easily, is more forgiving, and yields a more natural look than the cream ones I tried. A few other things I love about the Tarte Pro Glow to Go Highlight and Contour Palette: it smells great, is small enough to fit in a small purse, and at $23 is a lot cheaper than most contour kits out there.
What are your guys’ experience with contouring? Are there any great products you’ve found? Do share in the comments below!
XO,
Terra
Tarte Pro Glow to Go Highlight and Contour Palette // NARS Blush in Orgasm //
Cheek contour & sculpt brush // Nose contour brush // Highlight brush