
Whew, we made it to Friday! I’m back from NYC and excited to write the next piece in my blogging series. Today I want to discuss how to create compelling imagery for your blog and your blog’s Instagram. If you’re reading this and don’t have a blog, this information is still helpful for your everday iPhone snaps. Blog or not, we’re all creating and sharing photos on a weekly (or even daily) basis in this digital day and age, so why not make them shine? 🙂
First, a few disclaimers…lol! I have no formal education in photography. Everything I’ve learned I’ve picked up by reading articles, watching YouTube videos, and (over)analyzing photos I like. I’m still learning and improving everyday and am not an expert by any means; what I’m sharing is what I’ve discovered that’s worked for me. Second, there is so much that goes into portrait photography. I’ll do my best to cover the basics, but feel free to ask me if you have questions or are looking for more information on a specific aspect.
Ok, let’s roll! 🙂
 Top // Jeans (similar- $20) // Bag
1. Equipment
I started blogging last August and invested in my first digital camera this March. I got the Nikon D3400, an entry level digital camera (under $400) and a 50mm F1.8 portrait lens. I highly recommend this combination for anyone getting their girst DSLR! I find a digital camera makes a huge difference for blog photos because iPhone shots tend to look pixelated on a computer screen. When it comes to Instagram however an iPhone is perfectly fine. If you are just starting though, it’s fine to use an iPhone for everything in the beginning and invest in a digital camera after a few months. I’m not techy gal and let’s just say I found my digital camera overwhelming when it first came in the mail! What really helped me get a feel for it was watching YouTube videos to familiarize myself with the most basic buttons/dials and then learning about the “golden triangle” of shutter speed, aperture, and ISO. Once I understood the basic principles of how these things interact with each other and can be manipulated to adjust lighting and the “blurriness” (or “bokeh“) of a background, I found shooting on manual mode was actually much easier than I thought!
2. Determine what your photo is “about”
Think about what exactly your’re trying to share with your audience since this will guide how you take your photo and what you include (and don’t include) in it. Deciding what your photo is about will help you crop out things that may “distract” from the focus you’ve determined.
 Top // Shorts // Bag // Bracelets here and here
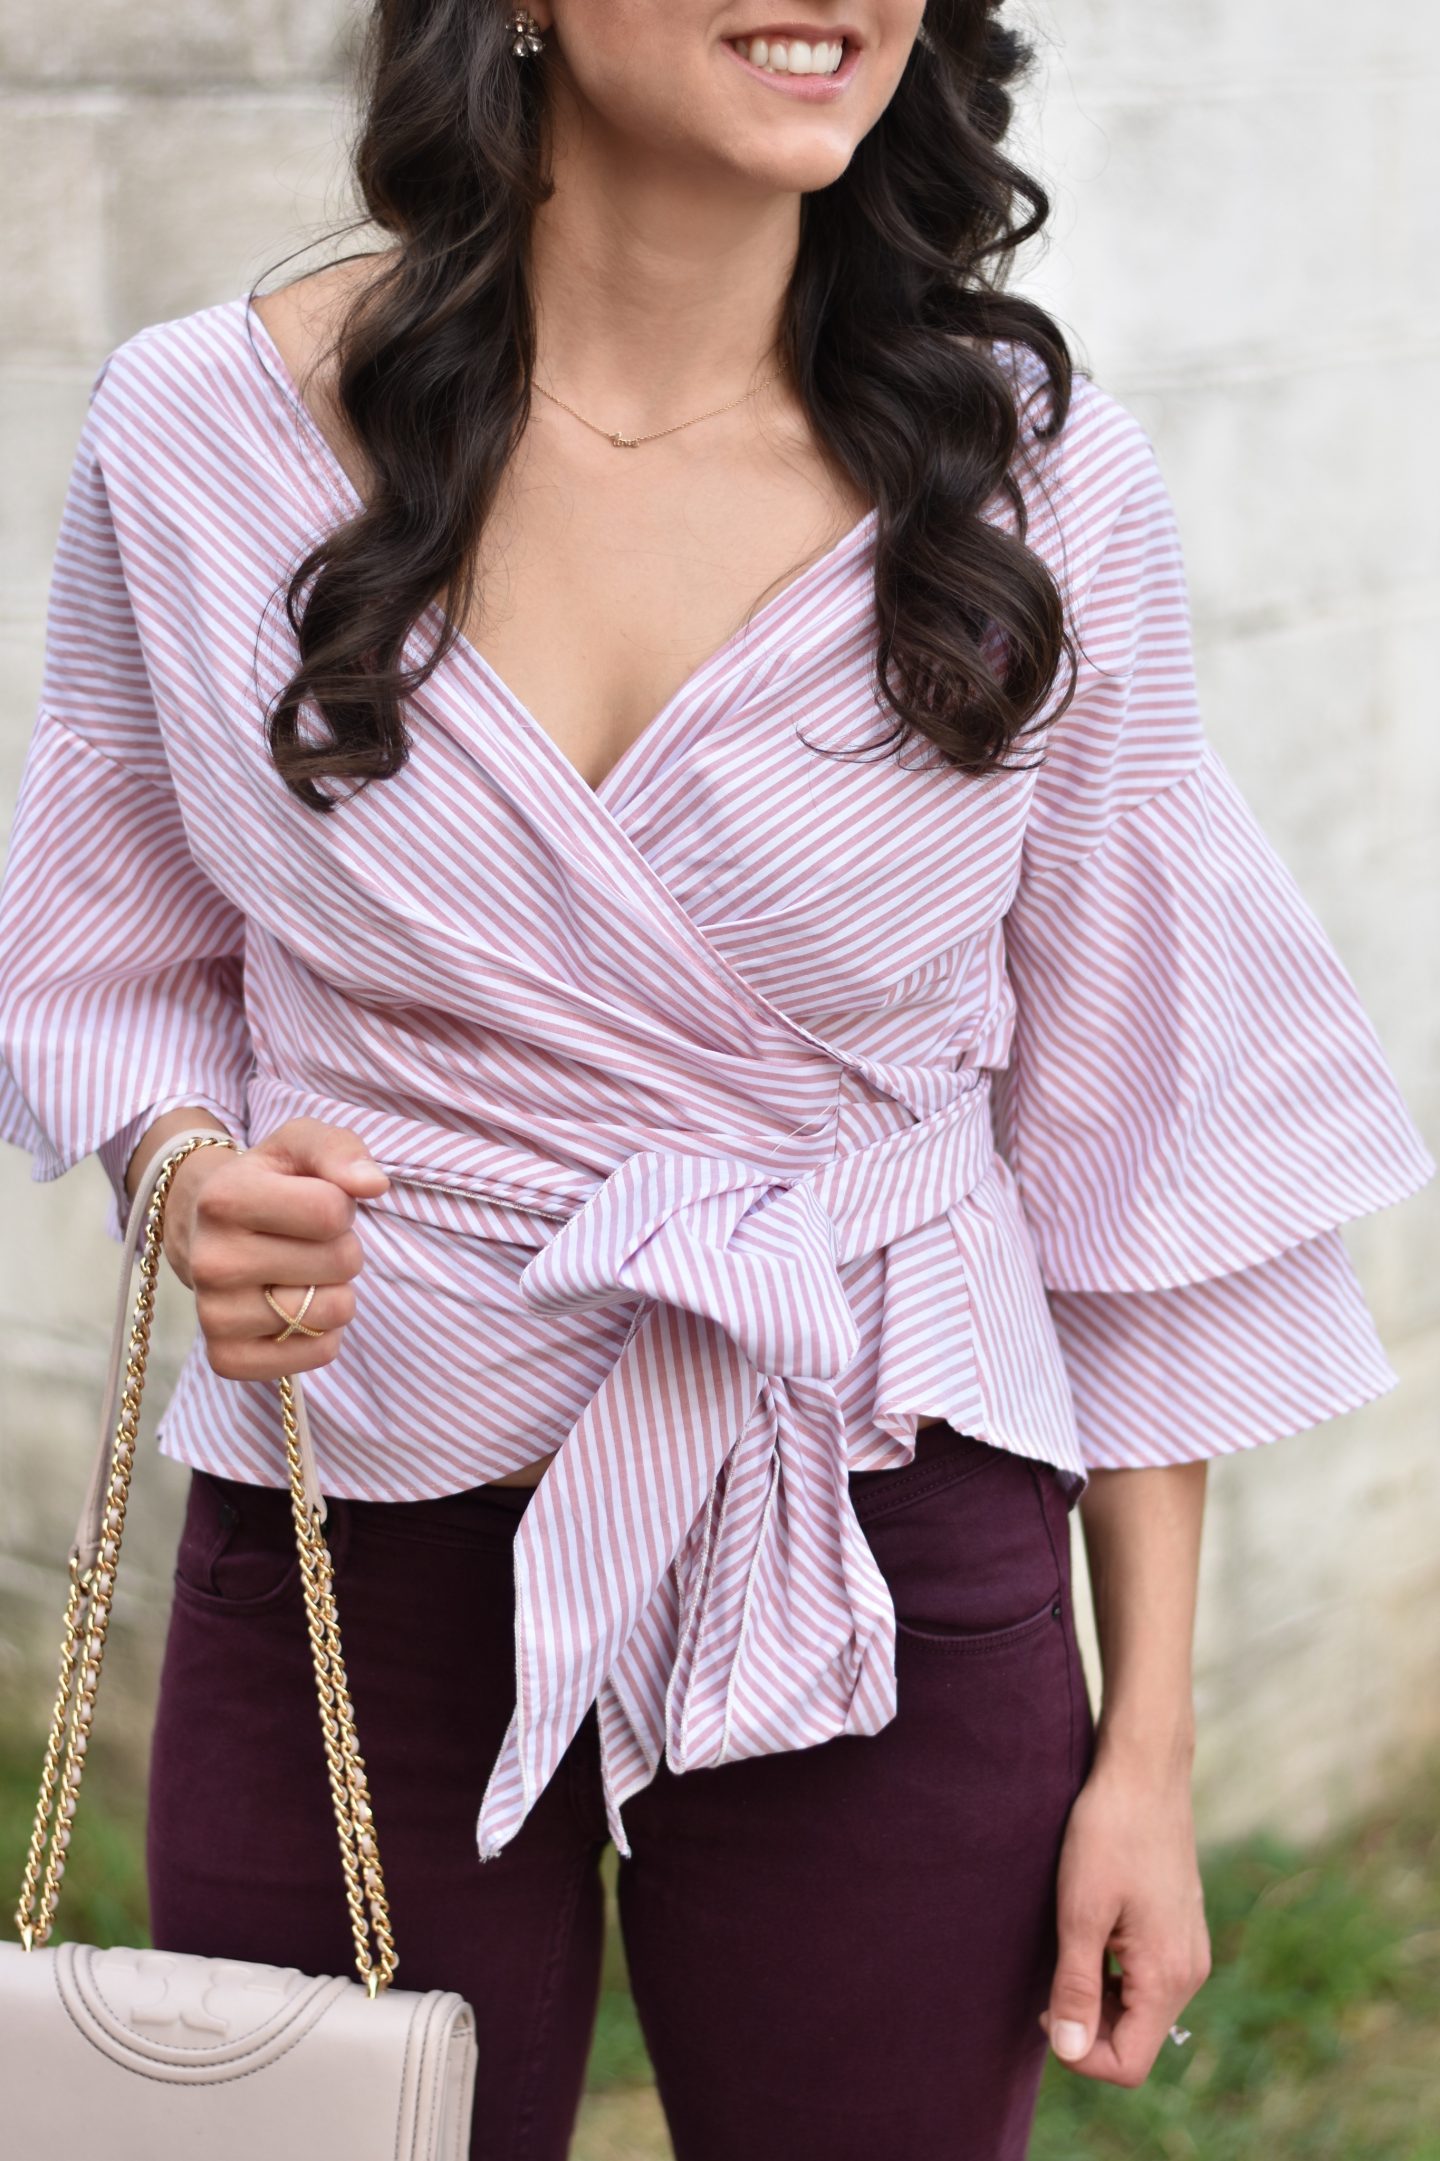
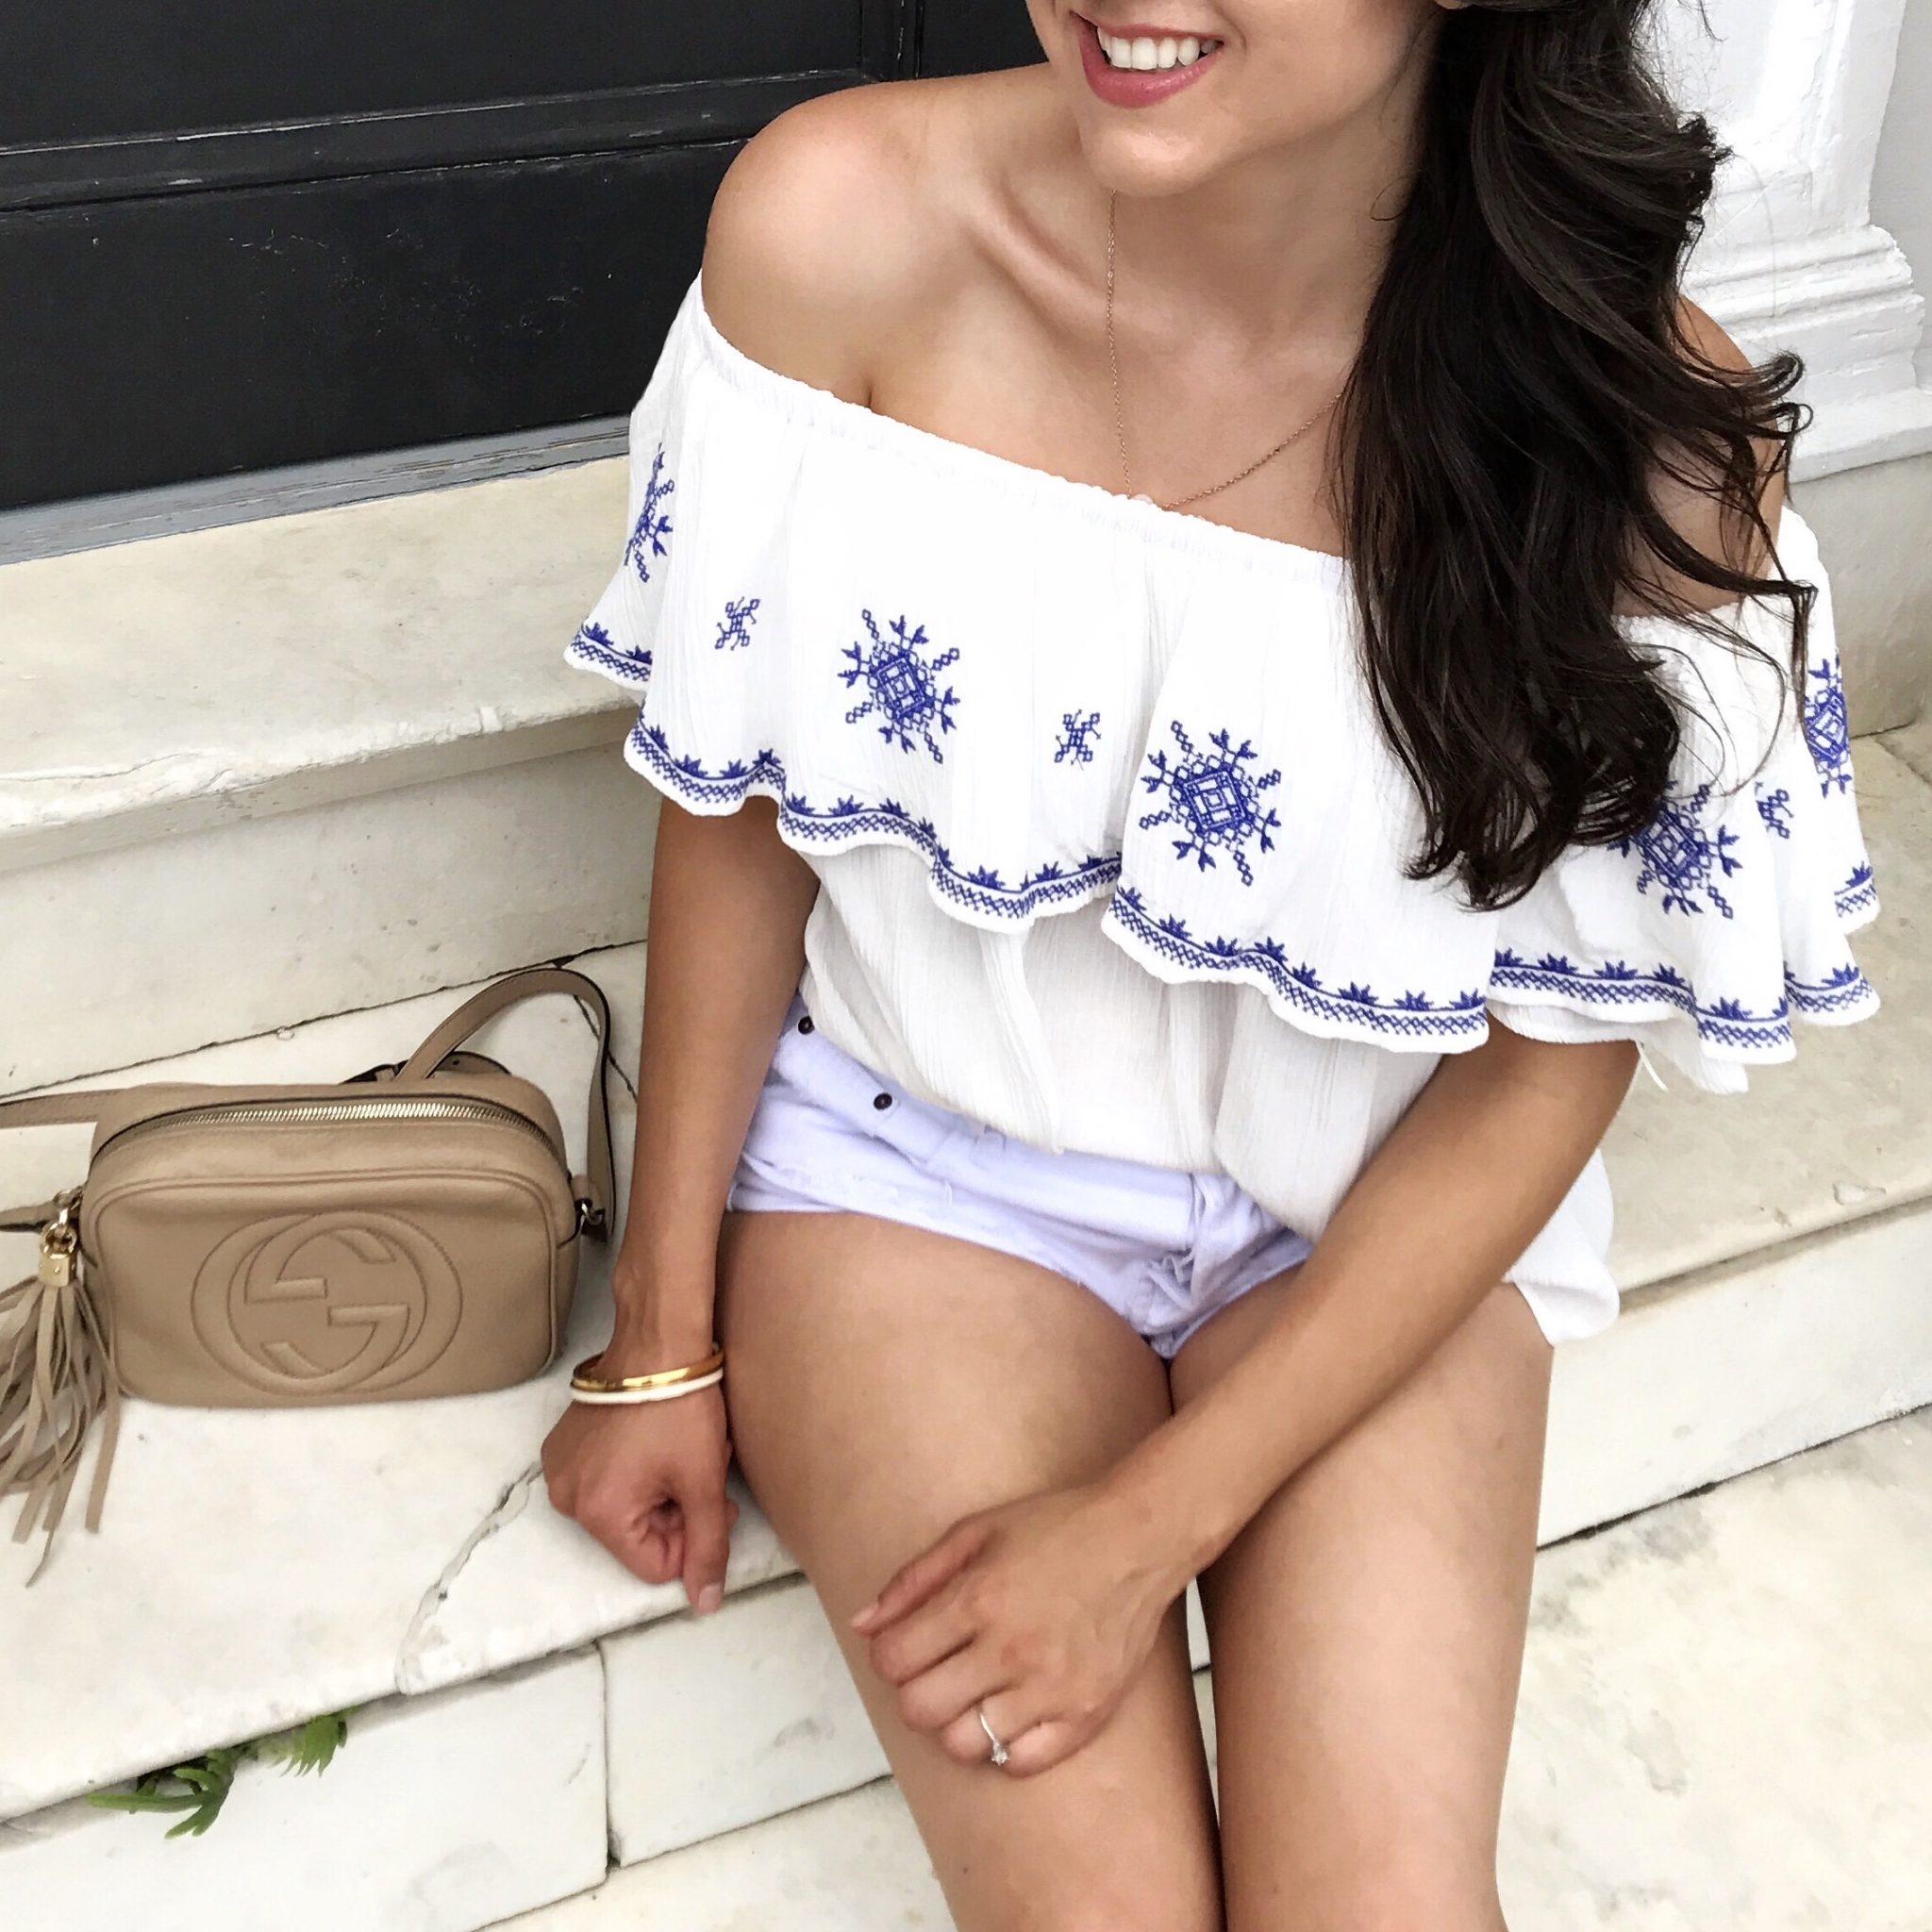
For instance, I wanted to show off the pretty blue embroidery of this top, so I intentionally cropped out my face. From the age of infants we humans are instinctively interested people’s faces. In this example, including my face would draw the eye to it, so I cropped selectively to ensure the focus was what I wanted it to be…the gorgeous embroidered detail of this top.
3. Mix things up
This one is especially important for Instagram where your photos are laid out side by side on a grid. This grid is the first thing someone sees when they come to your page and if you have a lot of similar shots, it can look a little boring. If you want to pull your audience in and get them to stay a while, why not mix things up!
Here are the main ways Ridge and I like to inject a little variety into the photos we take:
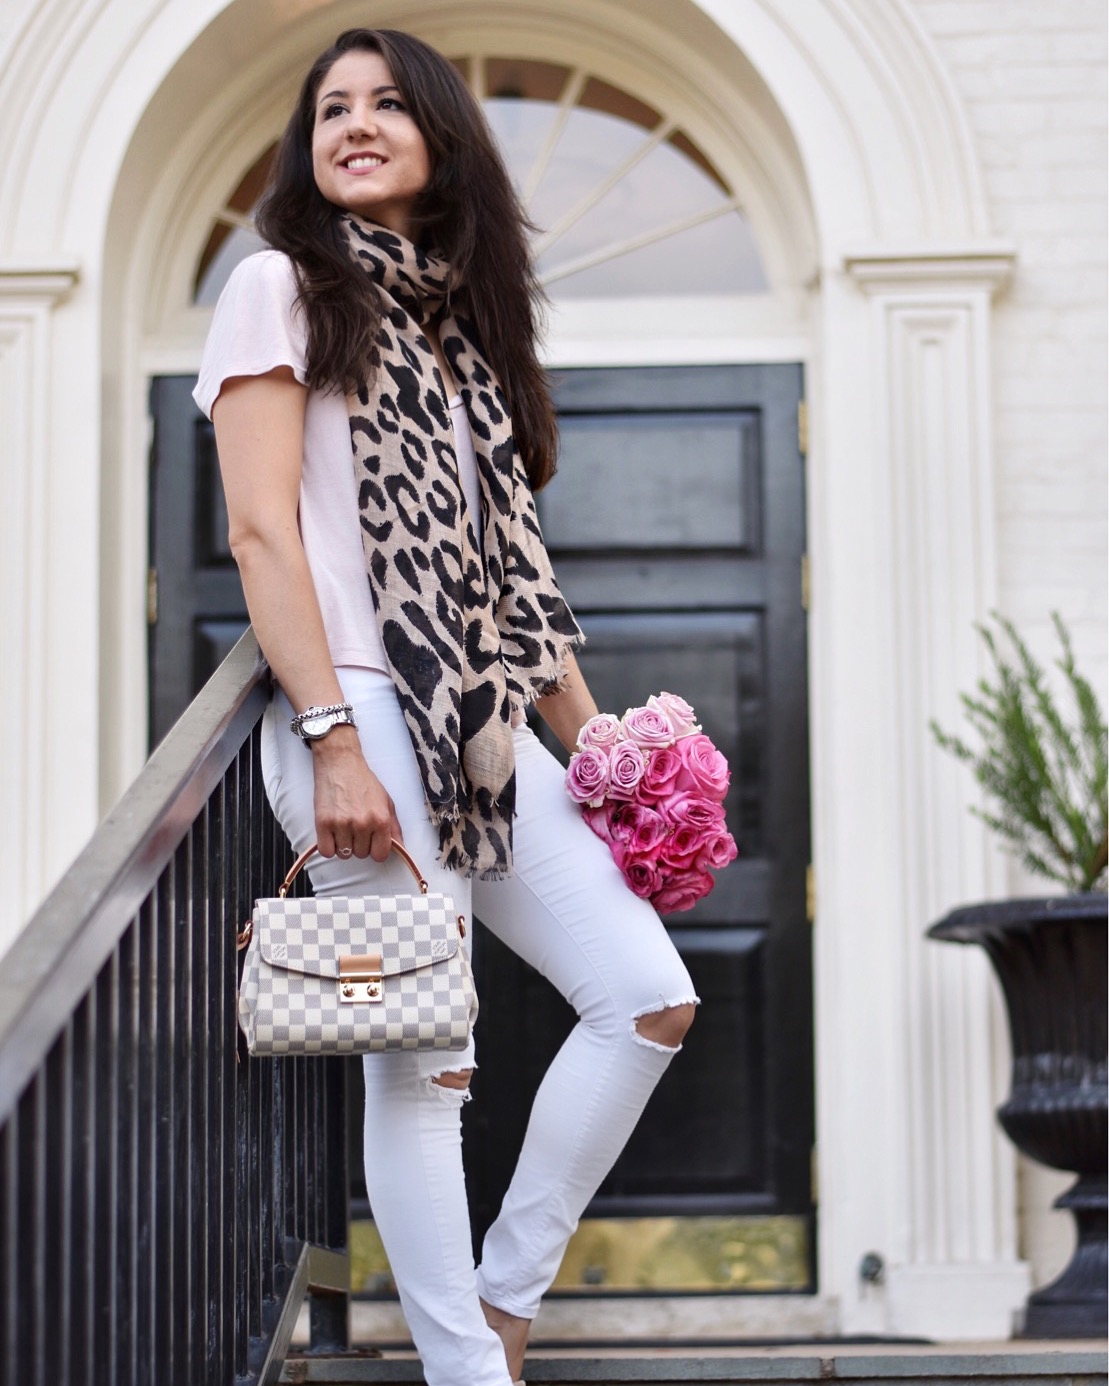
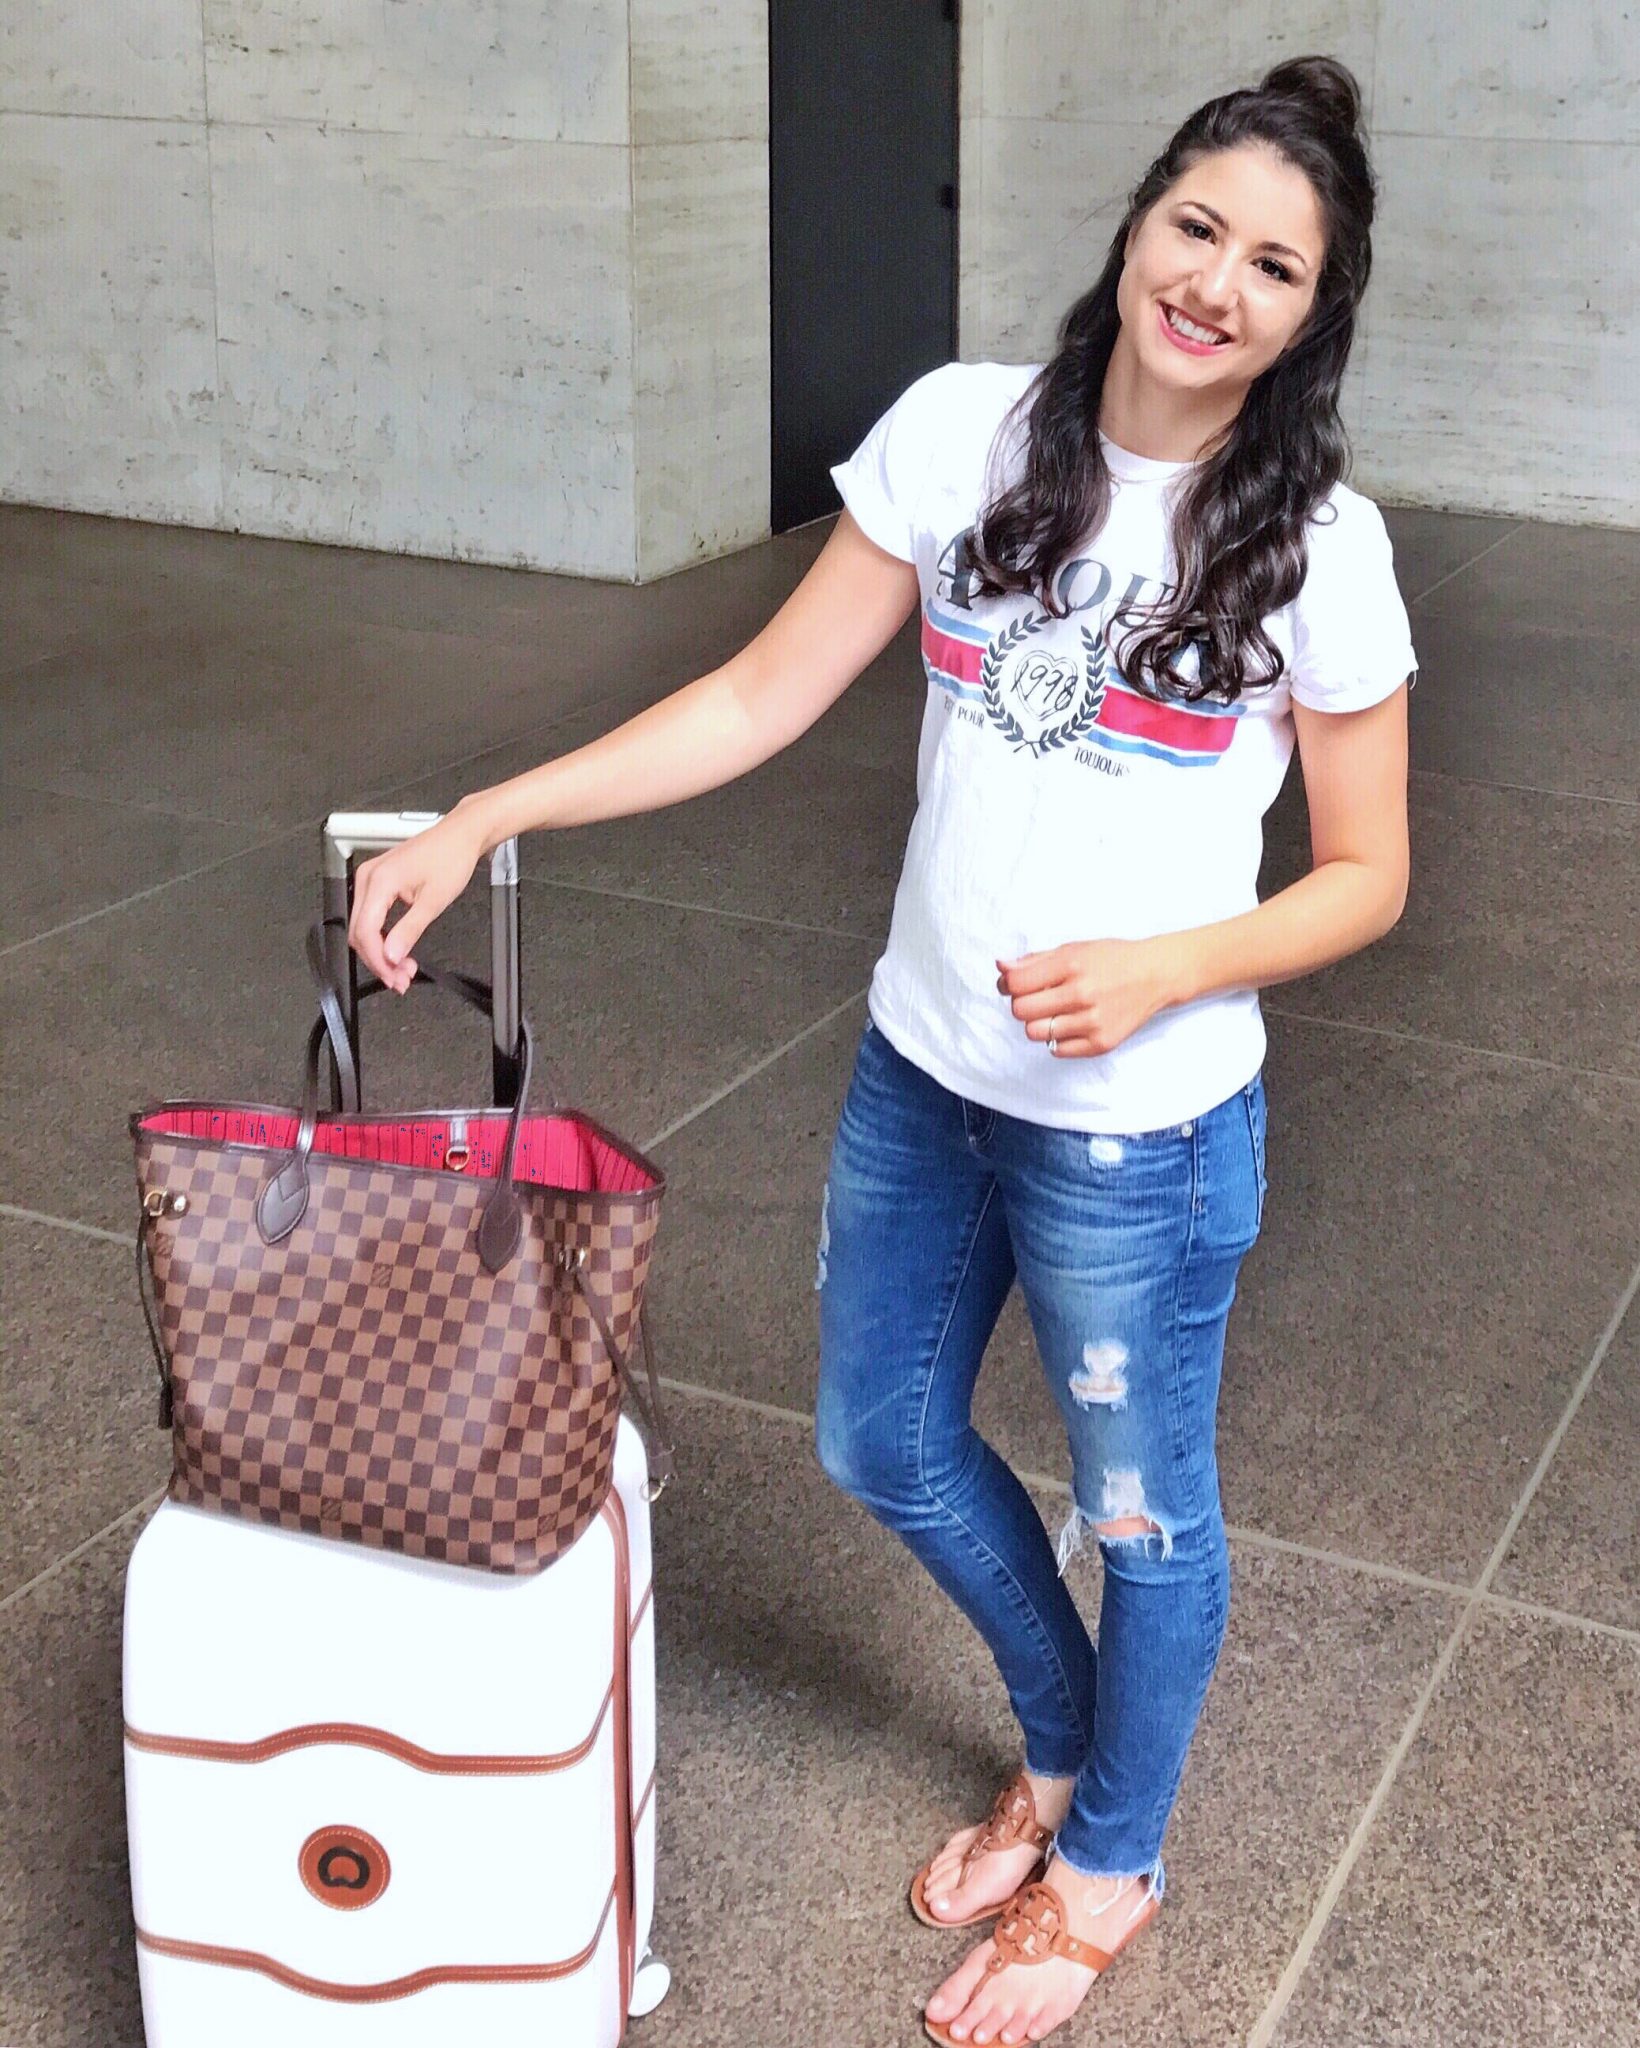
-Hold the camera high (and angle it down), or hold it low and angle it up. This first technique will make you look smaller and the second will make you look taller, but both angles that are very interesting. In the first example, the camera is held high and angled down; in the second it’s held low but angled up.
 Tee // Jeans // Sandals // Bag // Luggage
 Top (similar) // Jeans (similar) // Scarf // Bag // Mules
-Take a variety of photos: close up shots, far out shots, full body “outfit” photos, half body shots (these are great for showing most of your outfit but getting a really high resolution in the image). Back shots and side shots can also make great photos. And don’t be afraid to try different angles- in fact, make a point to try different ones each time you shoot. Most of them won’t come out (at least they don’t for me!), but there’ll be that one “money shot” that makes it totally worth it. Last, don’t forget those detail shots! Some of my best engagement has come from these. For each outfit post I try to get 8-10 usuable photos from our shoot.
-When it comes to Insta, go beyond the outfits. I like sprinkling in images of people and things I love that aren’t fashion/beauty related (i.e. “lifestyle” photos). These photos are a great way to comunicate your life, personality and interests with your viewers. People want to know the person behind the blog and sharing a bit of your life helps your readers get to know you better.
4. Composition
I talked a bit about composition here because it’s such a huge part of creating a good photo. I like to think of the rules of composition as a bag of tools I have to work with each time Ridge or I set up a photo. When working with literal tools, sometimes you need a screwdriver but sometimes a hammer is required to create what you want. Similarly, sometimes the subject of your photo will benefit from one principle–and somtimes it’s a totally different one. Learning the principles of photography will give you several great tools to work with.
Top // Jeans (on sale for under $50) // Belt // Bag
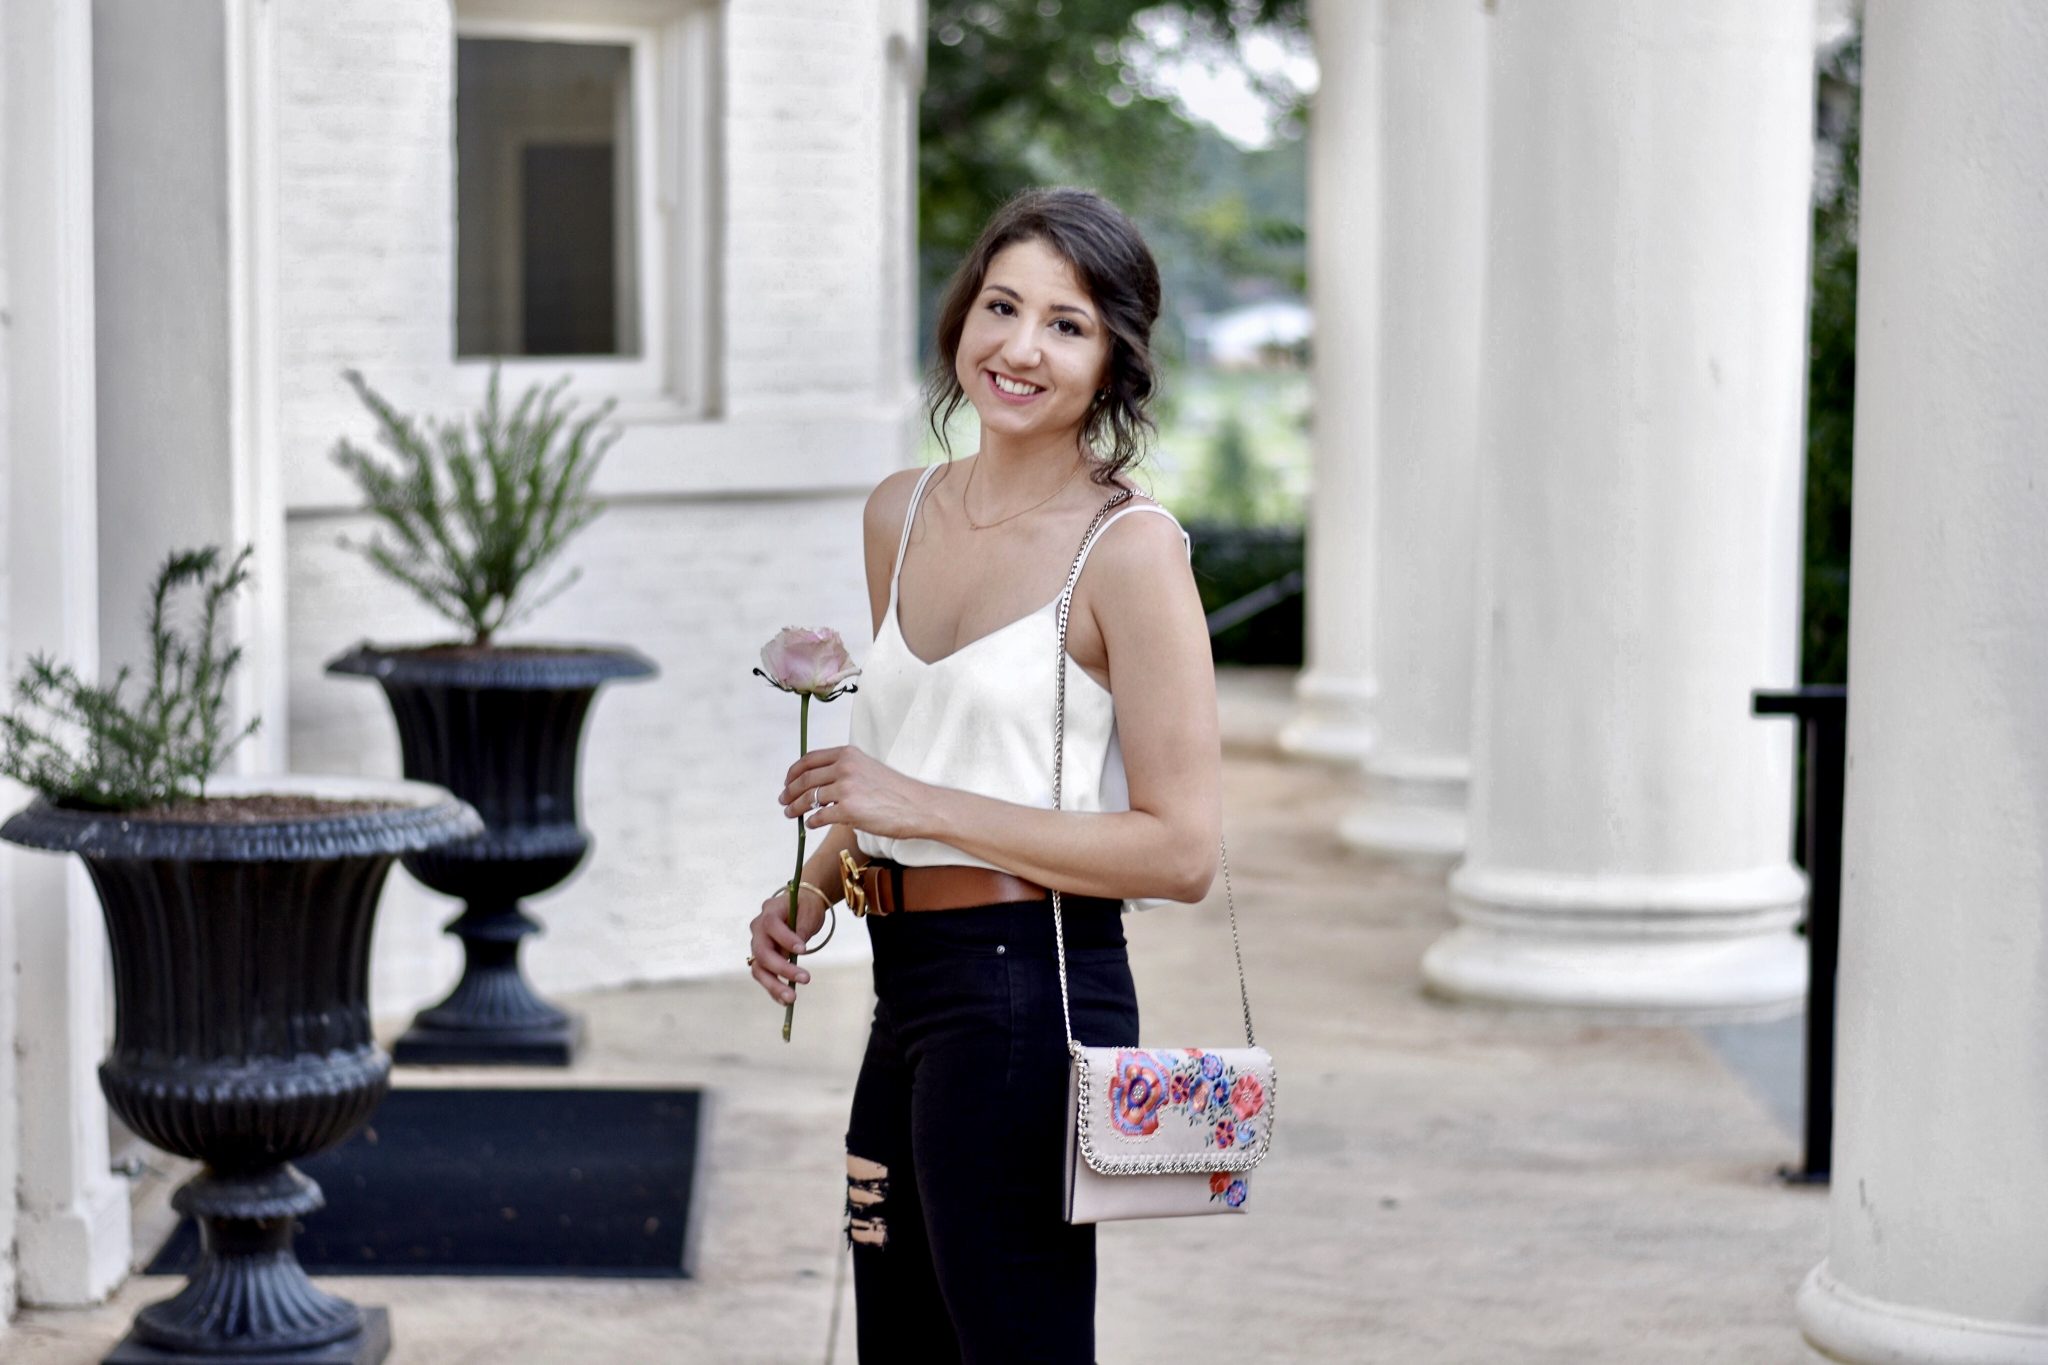
In the photo above we used the principles of Repetition and Leading Lines by placing the camera at an angle to the columns that made them all visible (Repetition), while their bases create an angled line through the image (Leading Lines).
5. Shoot in the right light
Outdoor light is always best. Also, the best time to shoot is shortly before the sun rises or sets– so early morning and evening. I always prefer the latter because I’m not a morning person. 🙂 The challenge with shooting at other times is the light can cast really harsh shadows on your photos. If you do have to shoot in the middle of the day, try to find an area that is shaded by a building.
6. Think about the background
While the subject of your photo is the focus, think about what’s behind it too. The key is to choose a background that matches your surroundings or deliberately contrasts with it. In this photo, I chose a floral background that echoed the feminine vibe of my look and the floral clutch I was holding:
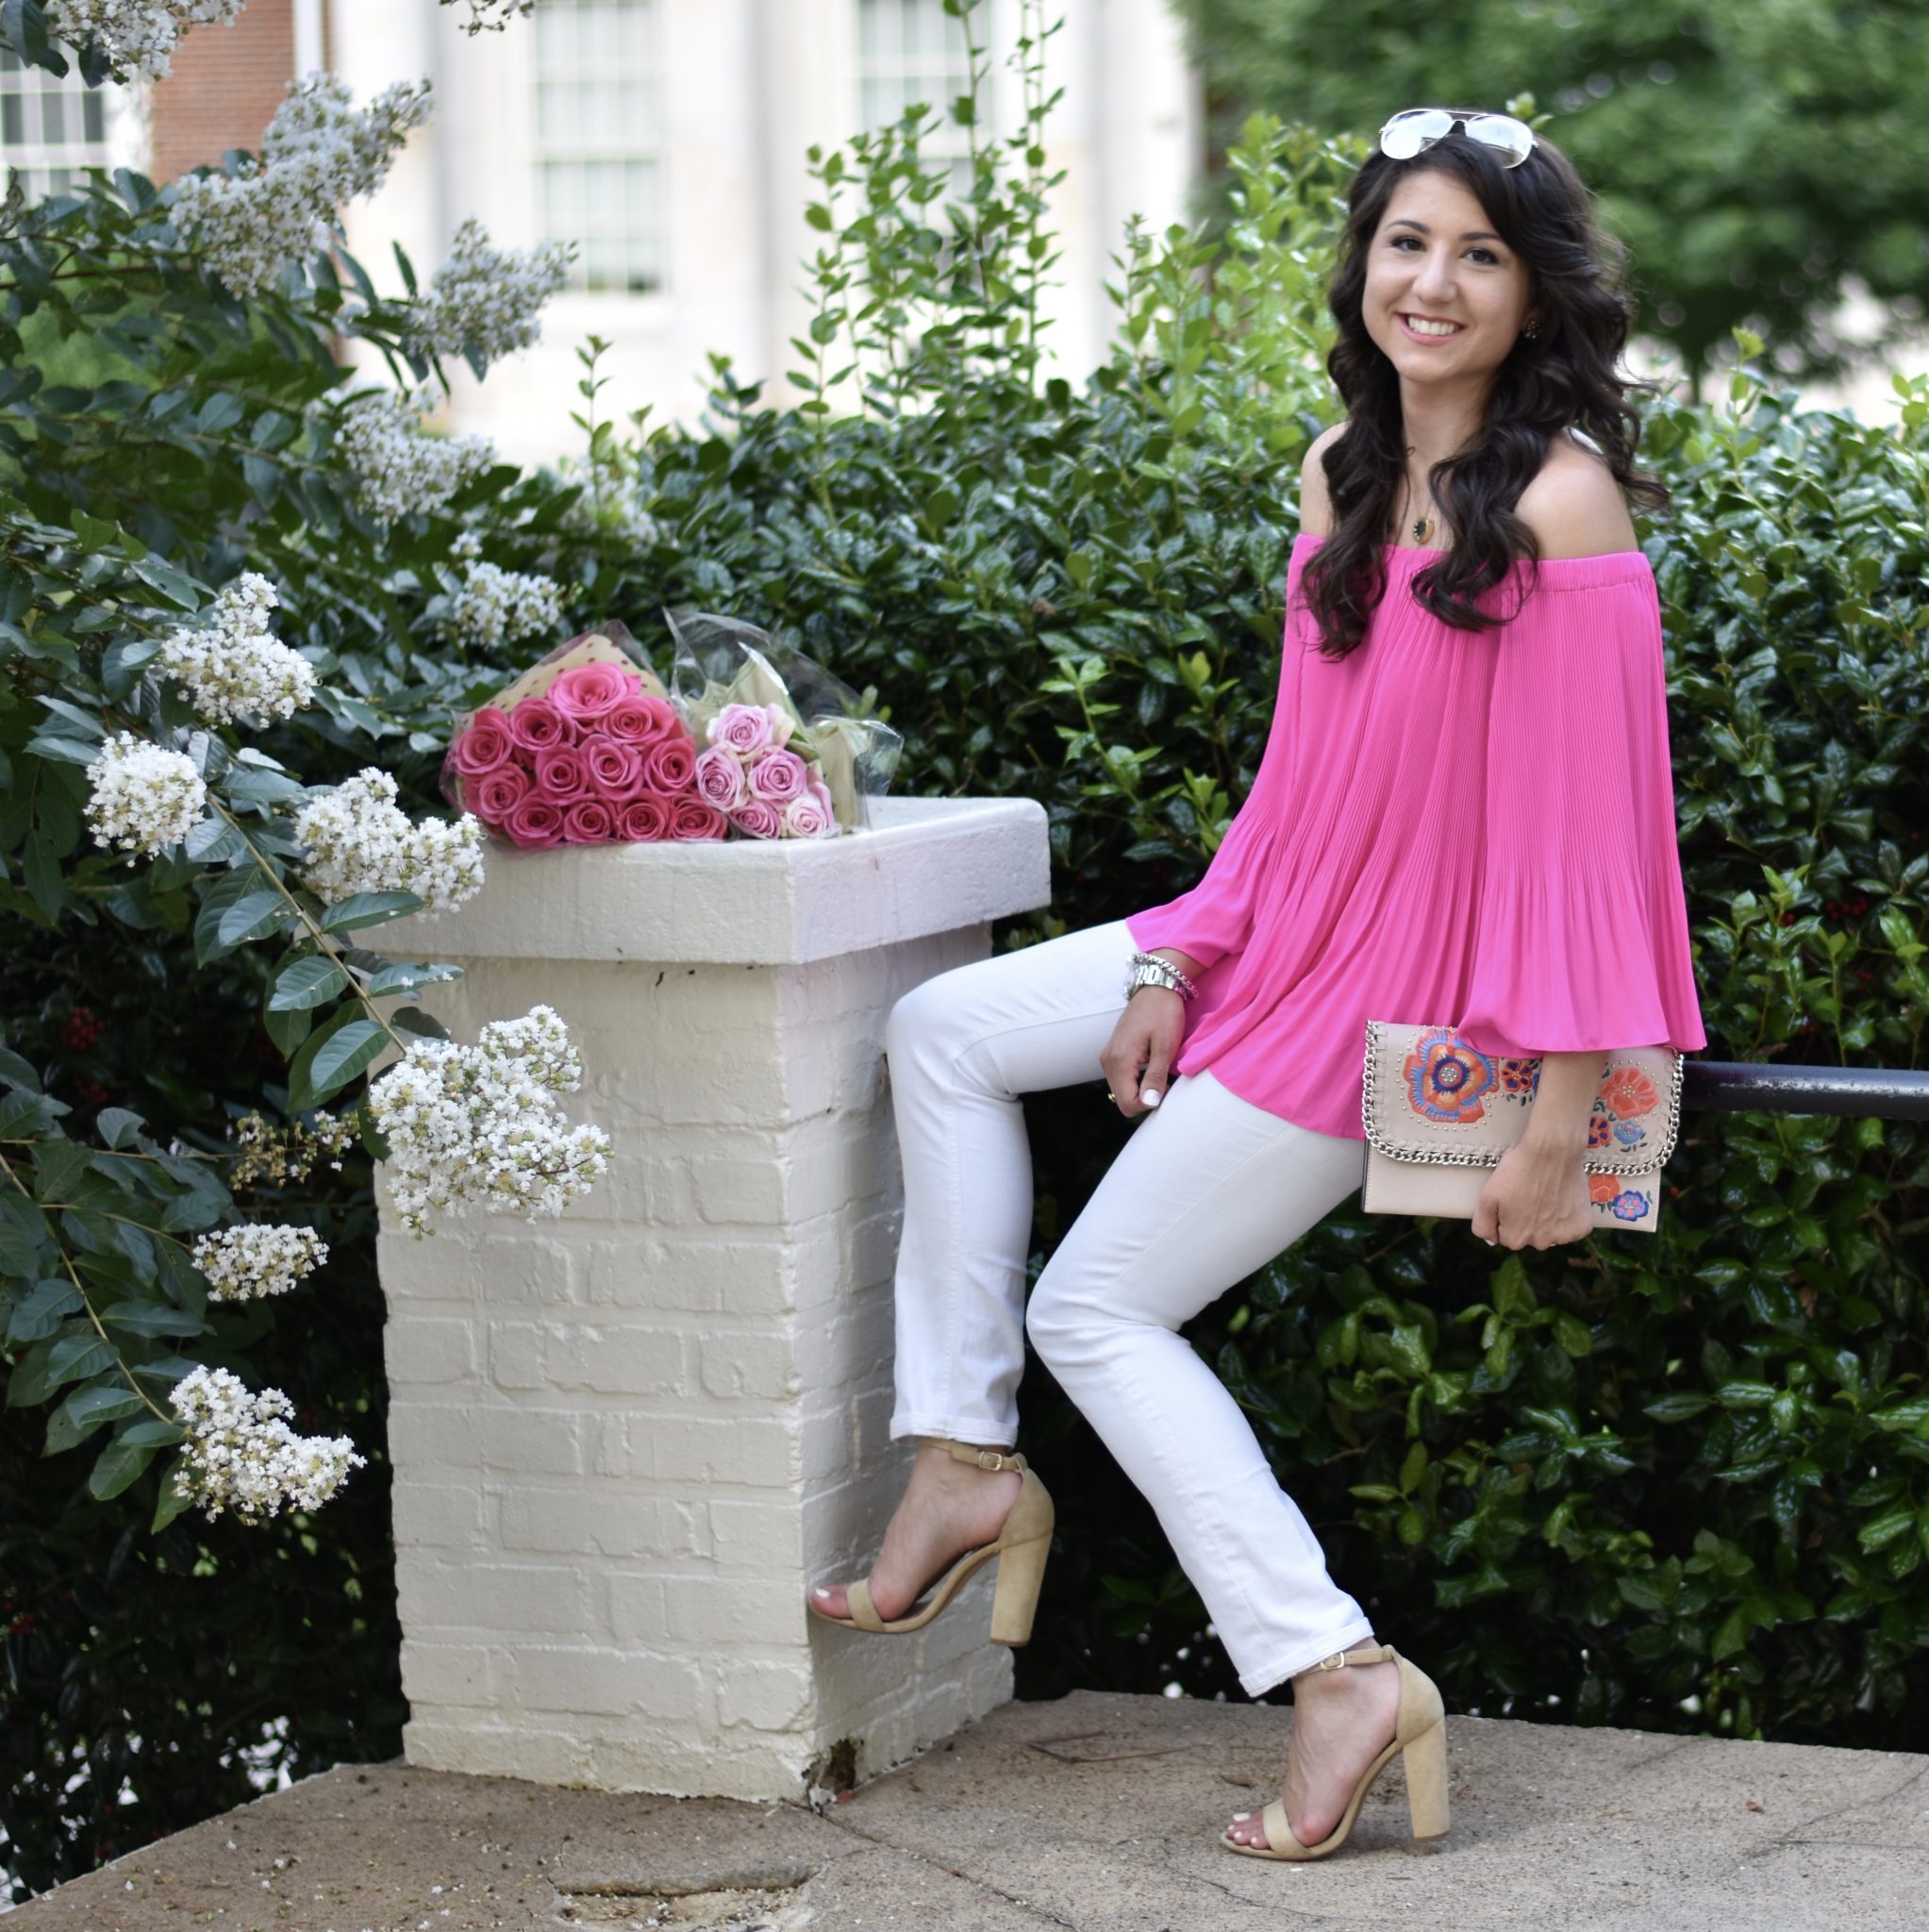 Top // Jeans (similar) // Bag // Necklace // Sandals // Sunglasses ($12)
7. Editing for the win
My philosphy on editing: make your photo look as close real life when you snapped the shot. Cameras often have a way of distorting certain things (e.g. making photos taken inside appear “yellow”); editing apps can get your photo to more accurately reflect the beauty of the moment and place that you took it.
Here’s an example of a photo I edited for Instagram. The restaurant had a really cool, crisp black and white theme going, but my iPhone added a lot of yellow and exaggerated shadows. I used Snapseed to brighten and take the temperature down (to get out the yellow), and the whiten feature in FaceTune to make the whites look white.
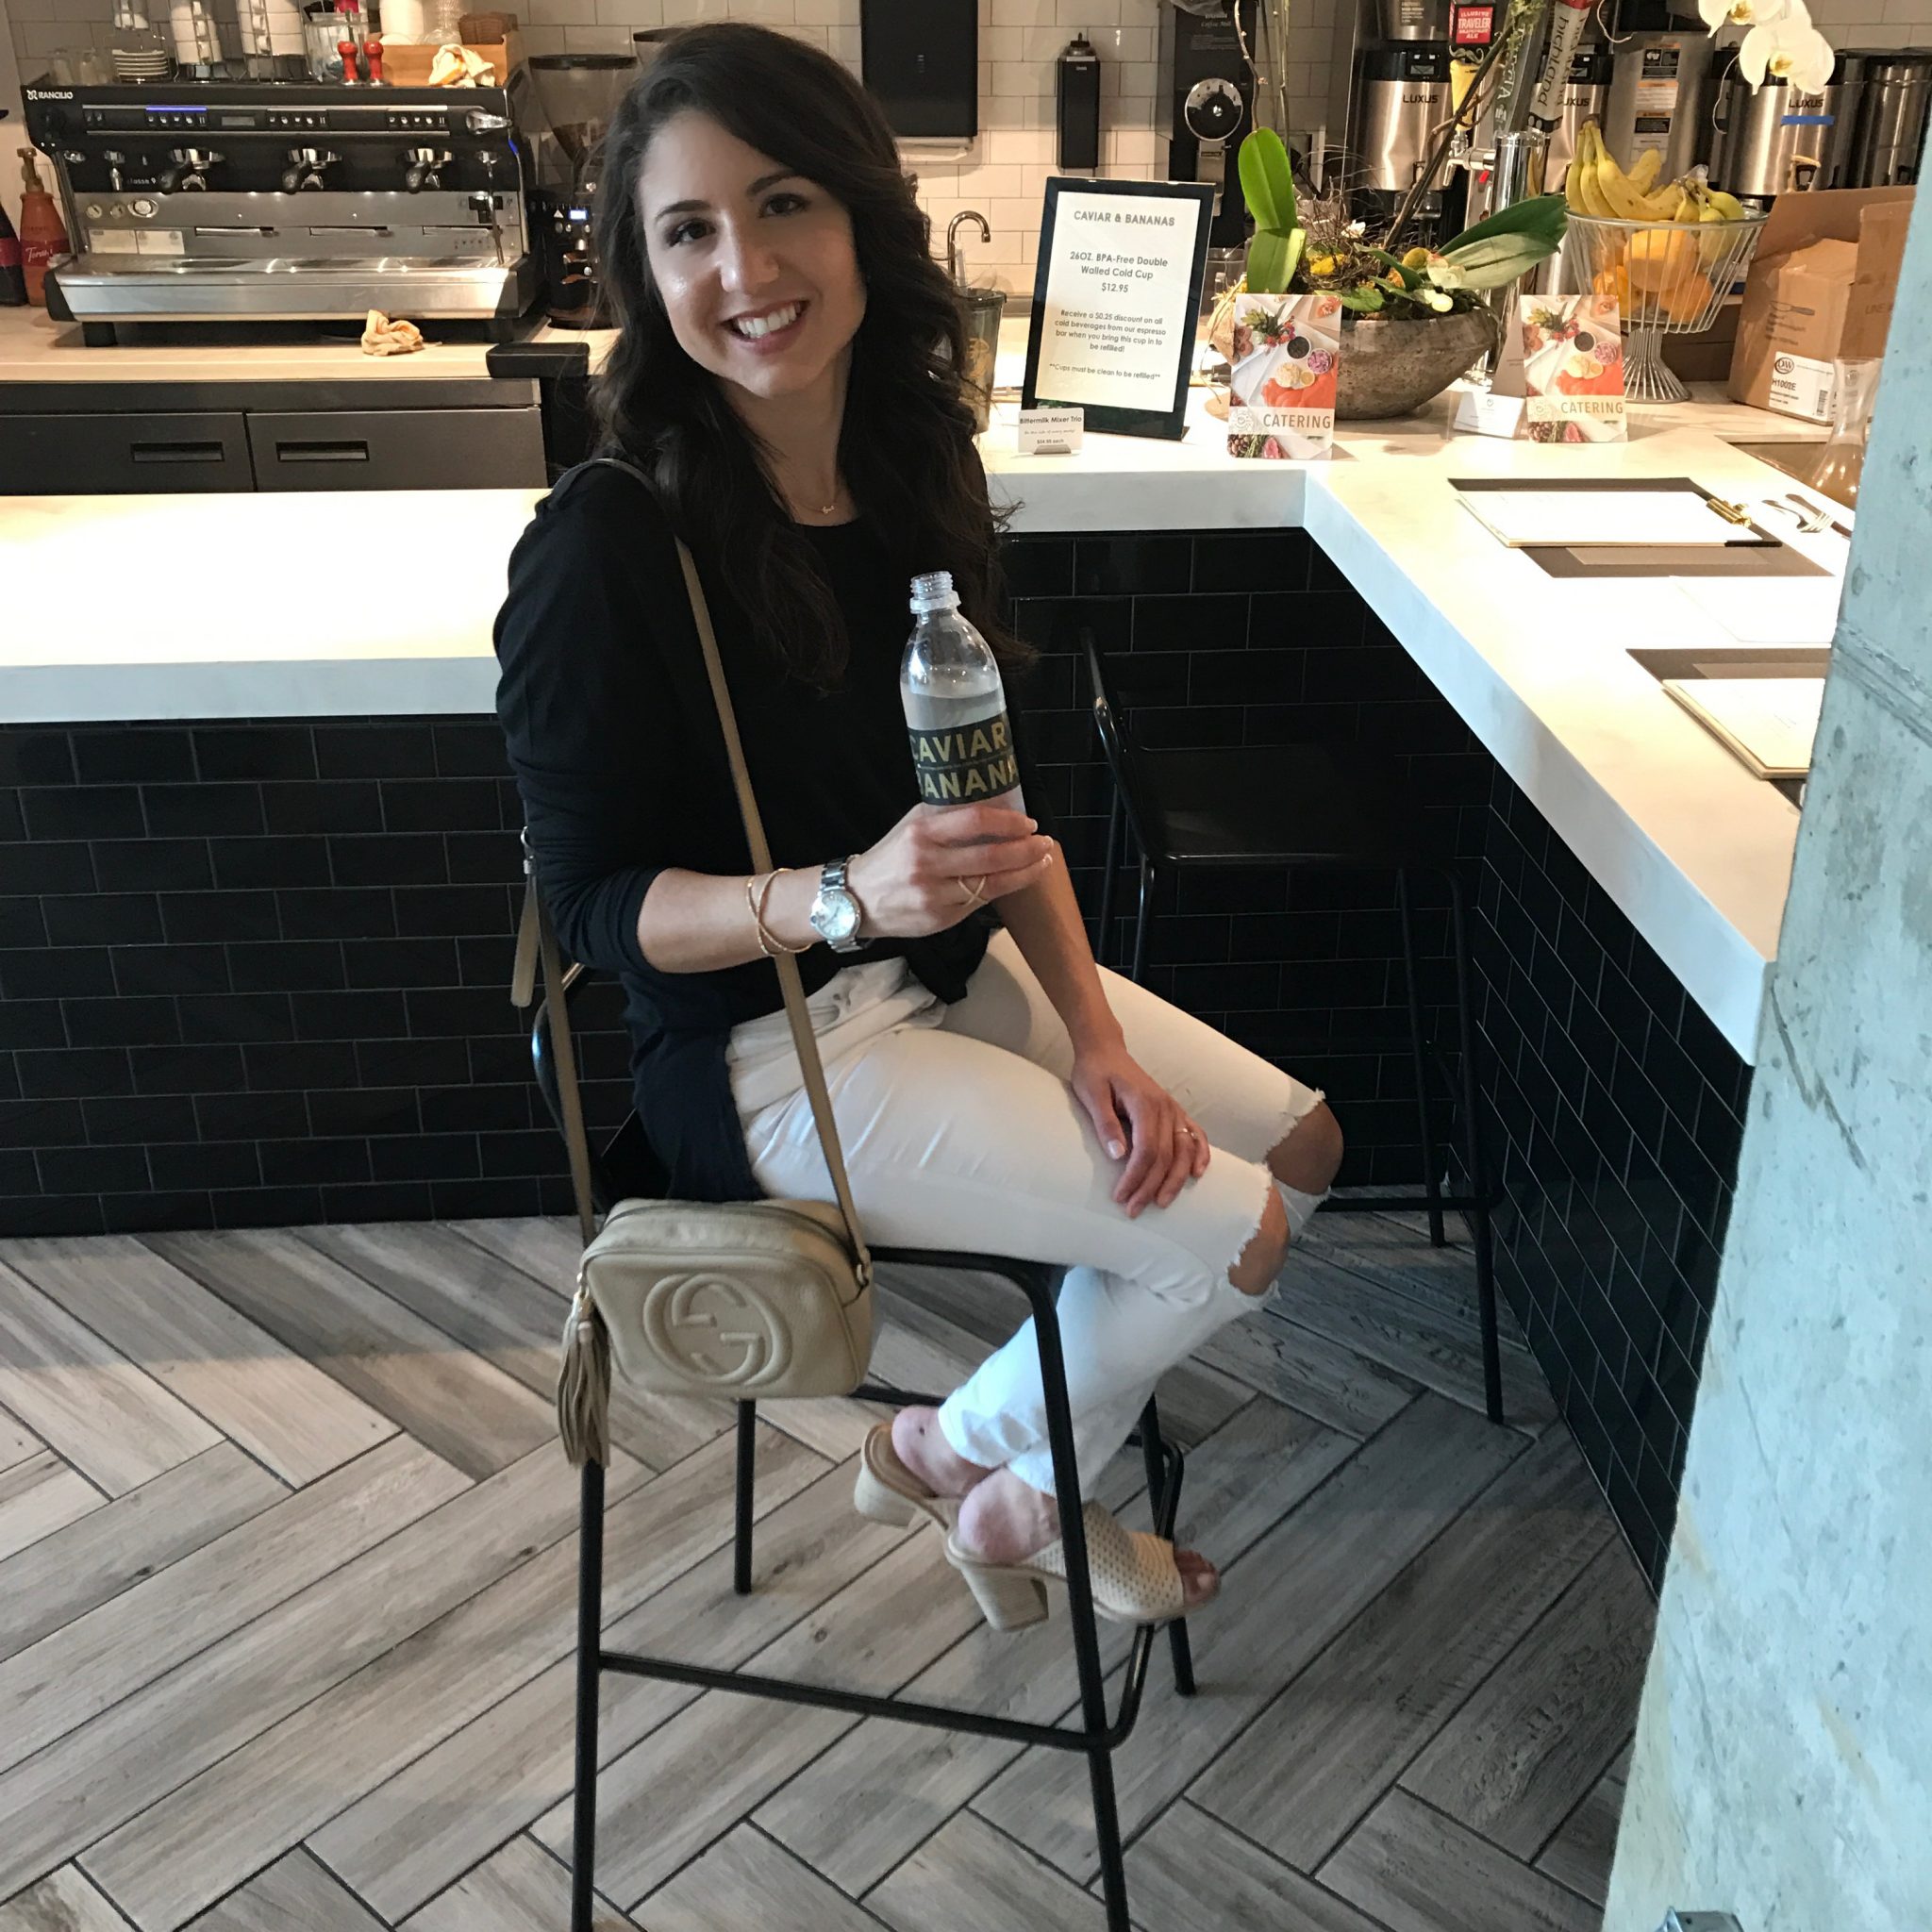
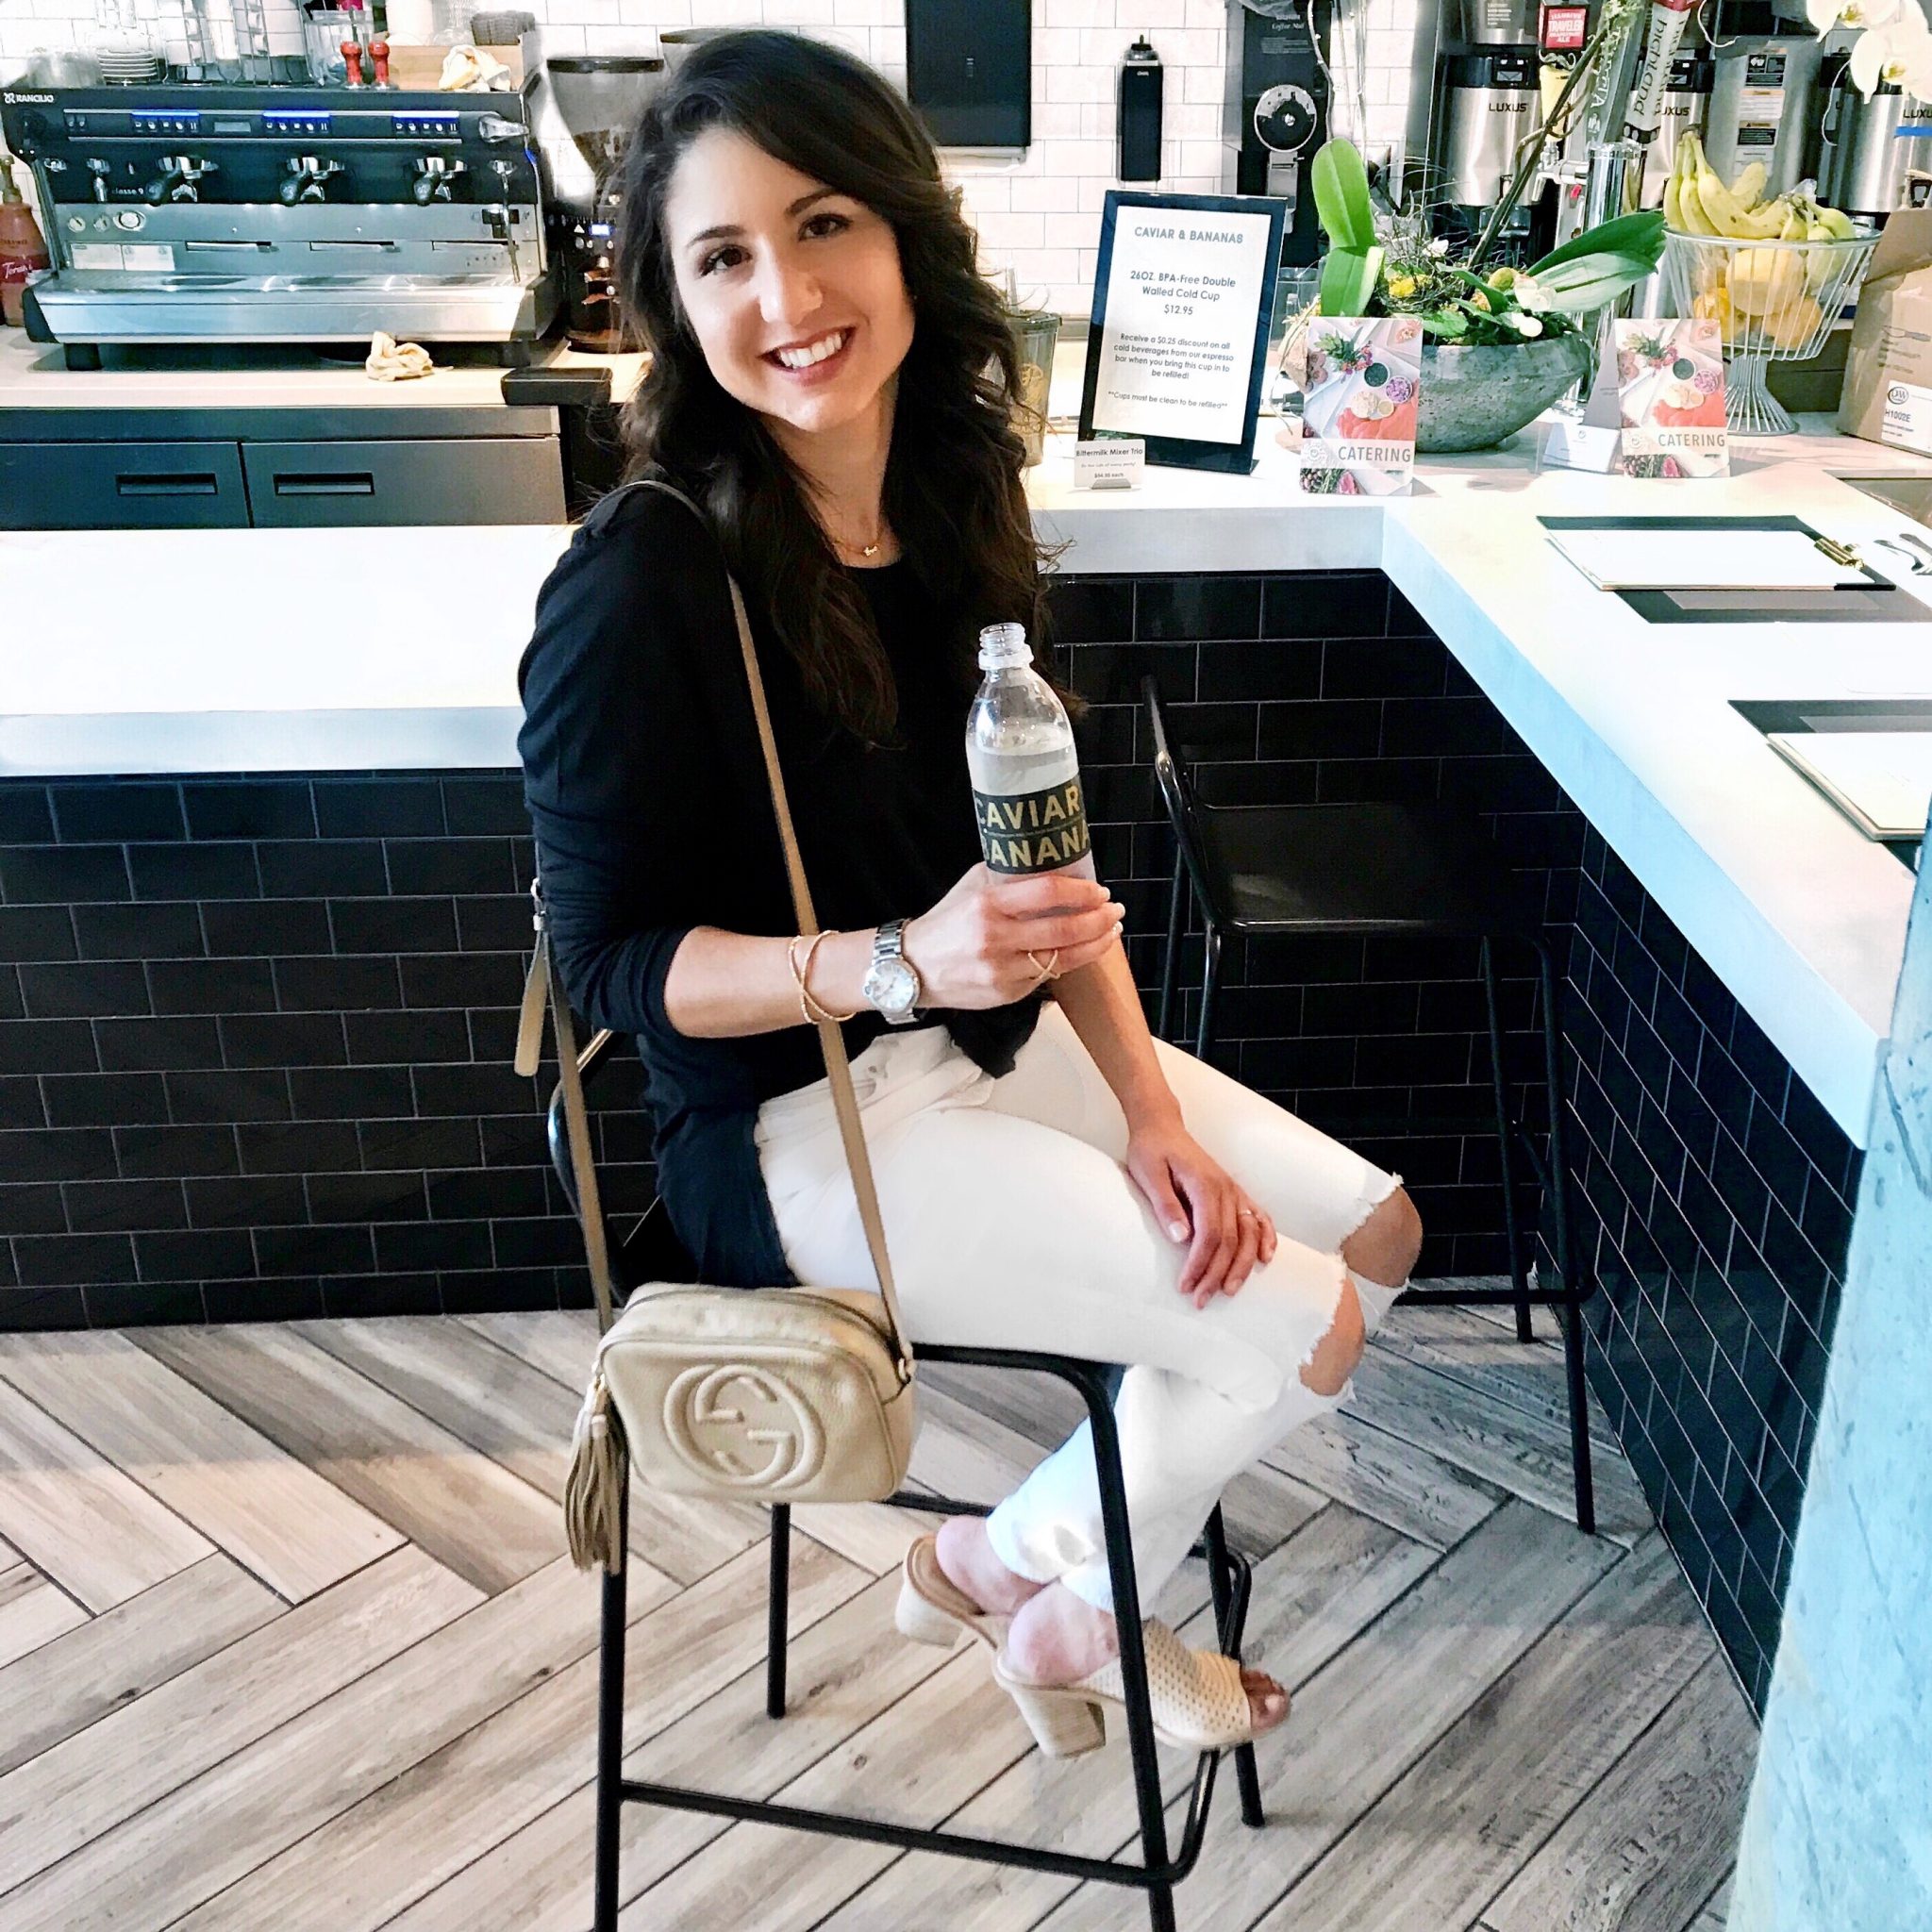 Long sleeve tee ($19) // Jeans (similar) // Mules (on sale) // Bag
Editing helps with lighting and color but it can’t change composition, so make sure your image is well composed before you start editing. When taking photos with a digital camera, it’s always better to under expose (create an image that’s slightly too dark) than over expose (create an image that’s too light). Dark photos retain detail well and can easily be lightened, but ones that are too light are nearly impossible to darken. Everything I’ve learned about editing I’ve picked up from YouTube videos like this one.
…and that’s it for photography basics! I know this is a ton of informationt to digest. It takes time (and practice!) to learn these things and get them to feel second nature. Once you learn them though, they’re skills you’ve got for life and are totally transferrable to photos of your children, pets, a landscape…or even your morning java.
I hope you have a wonderful Labor Day weekend and feel free to reach out if you’ve got any questions!
XO,
Terra
Great post Terra! I loved the before and after editing examples ????????
Author
Yay! I’m so glad you enjoyed Meredith!
Thank you so much for this information! I’m going to take the plunge into getting a DSLR soon!
Author
I’m so glad you found it helpful! So exciting on the DSLR…can’t wait to see! <3
I love this post! Your tips are SO helpful! I was just telling my husband I want to invest in a digital camera, but I wasn’t sure what to get- now I know 🙂 Thanks!!
Author
So glad it was helpful! I have been so happy with the Nikon D3400. Best of luck, girl! <3